All posts by Linaeum

Oktoberbrawl Recap

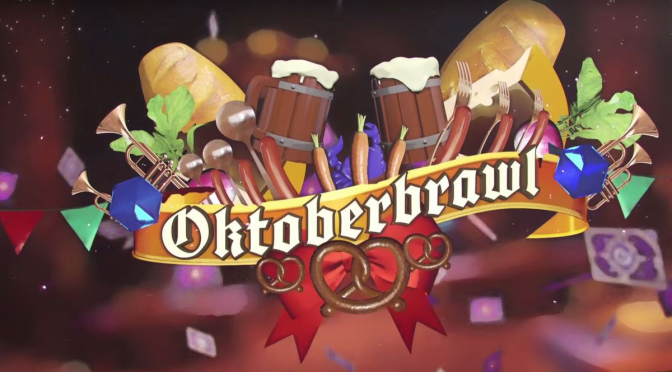
This year, as part of a cross-promotion between Twitch Prime and Hearthstone, the first-ever Oktoberbrawl took place. Featuring six popular streamers divided into two teams, as well as a rule-set that was different from anything seen before, this mini-tournament had four weeks of matches from September 11th to October 6th, with the Oktoberbrawl Grand Finals taking place at TwitchCon on October 20th.

The premise of Oktoberbrawl was simple: All six players participating in the event would receive a fresh account, 10 Classic packs, and a Welcome Bundle. On the Monday of every week, the contestants would each receive 10 packs from two different expansions. Then, on Wednesdays, they would receive a percentage of the second group of packs based on how many times players using their team’s card back (which came for free with a subscription to Twitch Prime) won games in Ranked Play.

Because Oktoberbrawl was a partnership between Hearthstone and Twitch, the players chosen for this event were some of the highest profile streamers in Hearthstone right now: Dog, Thijs and J4CKIECHAN for Team Void, and Kripparrian, Reynad and Alliestrasza for Team Light. All six of these players have popular Twitch streams, which made them the perfect candidates for this competition.


Week One:

The excitement began on September 11th, when the contestants opened their first card packs and got to work building new decks with their very limited resources. Because of the Welcome Bundle and the 30 packs they were given, the players all were guaranteed to receive at least 4 Legendaries and a large variety of Epics, Rares and Commons, which would serve as the foundation of the decks they’d create.

On September 15th, Team Light and Team Void had their first showdown. Using their Basic and Classic cards, along with a small selection cards from Goblins vs Gnomes and The Grand Tournament, the players each brought three decks to use in this grudge match.

The first round of the day pitted Thijs of Team Void against Alliestrasza of Team Light. In the first game of this round, Thijs played an Aggressive Mech Shaman against Alliestrasza’s Midrange Hunter. Thanks to the superior tempo tools present in the Shaman class, Thijs took a commanding early game lead over the Hunter. Alliestrasza actually nearly managed to come back, but then Thijs top-decked the lethal Lightning Bolt, putting the series score to 1-0.

In the second game, Thijs attempted to run a Control Priest, but Alliestrasza was on the verge of beating him with her Mech Mage when she suddenly lost connection. This forced the players to restart the game, but Alliestrasza’s deck was still better, and she soundly defeated him once again to tie the series 1-1.

Mech Mage made another appearance in the final game of the first round, as Thijs played it against Alliestrasza’s Zoo Warlock. For a while, the two players battled back and forth fairly evenly, but then Thijs managed to take a commanding board lead, and he took the series 2-1.

In the second round of the first day, Reynad of Team Light battled against J4CKIECHAN of Team Void. The first game of this round marked the third appearance of Mech Mage so far, as Reynad ran it against J4CKIECHAN’s Control Paladin. Traditionally a very favorable matchup for the Mage, the lack of powerful control cards in J4CKIECHAN’s deck only served to exacerbate this issue, and Reynad quickly won to go ahead in the series, 1-0.

In the next game, J4CKIECHAN brought out a Zoo Warlock against Reynad’s Shaman. This game should have been somewhat close, but Reynad failed to draw any early-game cards, which led to J4CKIECHAN easily taking the match, which brought the series score to 1-1.

In the final game of the second round, Reynad played a Control Paladin against J4CKIECHAN’s Midrange Druid. Reynad had a lot of powerful control cards, but he was unable to keep up with the power J4CKIECHAN managed to generate thanks to several lucky—or unlucky if you were supporting Team Light—jousts. Despite this, Reynad still nearly managed to come back in the game, but then J4CKIECHAN top-decked a Savage Roar to win the game and take the match 2-1.

The final round of the first day pitted Kripparrian, a streamer well known for his success in the Arena, against Dog, who is famous for not taking his shirt off. In the first game of this round, Kripparrian played a basic Zoo Warlock, while Dog ran the fourth Mech Mage of the day. This game was very back-and-forth until Dog pulled a Roaring Torch off the top of his deck at just the right time to win the match and take a lead in the series, 1-0.

The second game of the final round featured the first and only mirror match of the day, as two Mech Shamans went toe-to-toe. This should have meant that it would be a close game, but that couldn’t have been further from the truth, as Kripparrian shot off to an early lead and never looked back, tying up the series 1-1.

Mech Mage returned one last time for the final game of the day, as Kripparrian played it against Dog’s Aggro Warrior. In every game of the day up to this point, Mech Mage had easily triumphed over its opposition—however, after a pair of Kripparrian’s Spellslingers gave Dog the perfect cards for the situation at hand, the Aggro Warrior brought out Leeroy Jenkins to seal the game and take the series, 2-1.

Week 1 VOD — https://go.twitch.tv/videos/174956832


Week 2:

The second week of Oktoberbrawl began on September 18th. This week, the contestants were given Whispers of the Old Gods and Mean Streets of Gadgetzan card packs to add to their arsenal, in preparation for the second grudge match, which took place on September 22nd.

In the first round of the second week, Reynad battled against Thijs in an attempt to reverse the course of the first week. At first, it looked like he’d succeed, as his Zoo Warlock got off to a quick start against the Mech Shaman Thijs was running. Unfortunately, however, Reynad ended up running out of steam about halfway through the match, and Team Void took a 1-0 lead in the series.

In the second game of the first round, Mech Mage returned once more, as Reynad took on a Control Paladin from Thijs. As Reynad had experienced in the first week, Mech Mage is very strong against Control Paladin, and he managed to defeat Thijs and tie the series, 1-1.

In the final match of the first round, Reynad brought out an Aggro Shaman against yet another Mech Mage. Mech Mage had only lost one game in this entire competition, and this success continued, as its powerful tempo plays drowned out Reynad’s minions to take the series 2-1.

With Thijs’s victory, Team Void had won 4 games in a row, which meant that it was up to Kripparrian to turn things around for Team Light against J4CKIECHAN. Fortunately, Kripparrian had the tools to do just that, as he brought out the Mech Mage once more against J4CKIECHAN’s Aggro Rogue. Like it had done so many times before, the Mech Mage absolutely dominated the match, and Kripparrian took the Rogue down to take an early 1-0 lead in the series.

In the second game of the round, Kripparrian ran a Mech Shaman against what appeared to be a Zoo Warlock. However, J4CKIECHAN’s deck soon showed its true face, as he played the infamous Renounce Darkness. Transforming all of the Warlock Cards in his deck into random Shaman cards that cost one less than normal, J4CKIECHAN attempted to out-tempo Kripparrian with a swarm of cheap cards. Unfortunately, J4CKIECHAN ended up drawing a bunch of low-impact cards, which led to Kripparrian taking the first series win for Team Light in a 2-0 victory.

In the final round of the second day, Alliestrasza took on Dog in a match that would determine who would win the week. In the first game, Mech Mage made yet another appearance, as Alliestrasza used it against Dog’s Aggro Shaman. Up to this point, Mech Mage had only lost one game in the entire competition, but Dog managed to out-tempo Alliestrasza in the early game, which led to her defeat.

Things were looking bad for Team Light, but then, Alliestrasza brought out a C’thun Druid against Dog’s Midrange Hunter. Thanks to the massive Taunt minions included in this deck—and the Coins from a Cutpurse she pulled out of a Piloted Shredder—Alliestrasza shut down Dog’s aggression and tied up the series 1-1.

In the final game of the second week, Alliestrasza played a Mech Hunter against Dog’s Mech Mage. One of the closest games of the entire competition so far, this match went back and forth between the two for several turns until Alliestrasza managed to secure the board with a Houndmastered Carrion Grub. Two turns later, she crushed the Mage with a charging King Krush, and she took the series 2-1 for Team Light.

Week 2 VOD — https://go.twitch.tv/videos/176667021


Week Three:

The third week of the Oktoberbrawl started on September 25th, as cards from Journey to Un’Goro and Knights of the Frozen Throne were brought into the mix. Packs were opened, decks were modified, and then, on September 29th, the third grudge match began.

For the third week in a row, Reynad was the starter for Team Light, going up against Dog in the first round. In the first match of the day, Reynad played a Zoo Warlock against a Shaman Deck that the casters referred to as ‘Melting Pot Shaman’, because of all the different tribes it featured. Thanks to a wide selection of powerful early-game cards, Reynad shot off to a quick lead in this match, but Dog managed to come back (thanks to a pair of cheap Things From Below and an Invocation of Air from Kalimos), before sealing the match with an army of Totems to gain the series lead 1-0.

In the second game of the first round, Reynad played Mech Mage against a Control Paladin from Dog. In both of the occasions when this matchup had appeared in earlier weeks, it went very well for the Mech Mage, and this was no exception, as Reynad managed to take the game and tie up the series 1-1.

Mech Mage made yet another appearance in the final game of the first round, as Dog played it against a Control Warrior from Reynad. Back in the day, this was a fairly even matchup—however, in this game, Dog used a Micro-Machine to gain a quick damage advantage and he finished off his opponent on turn 6 with a Fireball-Frostbolt combo to take the first series 2-1.

With Reynad falling yet again, it was now time for the second round, where Alliestrasza took on J4CKIECHAN. In the first game, Alliestrasza brought out a Mech Shaman against a Midrange Token Paladin from J4CKIECHAN. Despite having better cards overall, Alliestrasza was unable to deal with the wide boards J4CKIECHAN created, and she ended up falling in defeat, which gave J4CKIECHAN a 1-0 lead in the series.

In the second game, Alliestrasza brought out her Midrange Mech Hunter from week two against J4CKIECHAN in the hopes of evening the series. Unfortunately, J4CKIECHAN decided to play a Mech Shaman, which absolutely tore apart the Midrange Hunter and gave Team Void the series win, 2-0.

These defeats put Team Light out of contention for the day, but there was still one round to go, as Thijs took on Kripparrian. In the first round of this final match, Thijs pulled out the Mech Handbuff Paladin against Kripparrian’s Mech Shaman. Thanks to an early Grimestreet Outfitter, Thijs was able to generate a lot of pressure early and nearly secure the game. At the last moment, however, Kripparrian used Thrall, Deathseer to turn an injured 6-mana minion into a charging Grommash Hellscream, which quickly won the game for the Shaman and put Kripparrian up 1-0.

In the next game, Thijs brought out a Control C’thun Druid in an attempt to control the game. This turned out to be utterly impossible, however, as Kripparrian fielded a heavily tuned Control Warlock that ran every board clear in the game, along with the mighty Lord Jaraxxus. Preventing Thijs from ever developing any kind of pressure, Kripparrian took complete control of the board and eventually took the game to win the series 2-0.

Even though Team Light had failed to win the day, Kripparrian had played really well yet again, which was a ray of hope for the future.

Week 3 VOD — https://go.twitch.tv/videos/178382750


Week Four:

In week four—which began on October 2nd—the players did something different. Instead of getting cards from one of the expansions, the contestants were allowed to play one Adventure of their choice for a short period of time in an attempt to collect a few more powerful cards. For example, Kripparrian played through the first several wings of One Night in Karazhan, while Alliestrasza ran through League of Explorers.

The grudge match for week four occurred on October 6th, and the first round began with Kripparrian of Team Light battling against Dog from Team Void. In the first game of this round, Kripparrian decided to play a Control Priest with lots of healing, Taunts and board clears, while Dog used a basic Aggro Shaman. For a while, this game was very close, but eventually, Dog managed to break through Kripparrian’s wall to take him out and secure the lead in the series, 1-0.

The second game of the first round was a Warlock mirror match, as Kripparrian played his Control Warlock from week three against Dog’s Hobgoblin Warlock. Combining cheap cards such as the Murloc Tinyfin or the Wisp with the powerful Hobgoblin effect, Dog consistently got onto the board—only to be driven off by Kripparrian’s powerful board clears. For a while, Dog tried to hang in the game, but it wasn’t long before he ran out of resources and was defeated, evening the series to 1-1.

In the third game of the first round, Mech Mage popped its head up once again in opposition to Kripparian’s Mech Shaman. For a match between two Aggro Decks, this game was actually surprisingly back and forth, until Dog finally secured the game with a Fireball and Fireblast combo to take the series 2-1.

In the second series of the day, Reynad took on Thijs in a rematch of the first week of the competition. In the first round of the match, Reynad brought out the Mech Mage against a Mech Shaman from Thijs. While Mech Mage is very strong at getting onto the board, it also struggles heavily if it ever runs out of resources, which is a situation Reynad found himself In about halfway through the game. Overwhelmed by Thijs’s big minions, Reynad attempted to fight back, but it wasn’t good enough, and he went down thanks to a top-decked Fire Elemental.

This put Team Void up 1-0 in the standings for this game, but Reynad wasn’t done yet, as he brought an Aggro Shaman to battle against Thijs’s Control Paladin. Despite an early lead in this game, however, Reynad just wasn’t able to maintain his control of the board (an issue that plagued him throughout the entire event), and he was eventually taken down by Thijs, who went 2-0 in the series.

In the final round of the fourth week, Alliestrasza took on J4CKIECHAN, who was trying out something a bit different with these decks. In the first game, Alliestrasza ran a Reno Paladin against a Control Priest from J4CKIECHAN in what was probably the slowest game of the entire event. Lasting for more than twenty minutes, it went all the way into fatigue before Alliestrasza was finally defeated, and J4CKIECHAN jumped to a 1-0 lead in the series.

In the second-to-last game of the final regular day, Alliestrasza pulled out the Mech Mage one last time, while J4CKIECHAN played a Control Druid of some kind. Unlike in the previous game, however, J4CKIECHAN ran out of ways to deal with Alliestrasza’s minions, and he was beaten into submission by a tide of damage, tying up the series 1-1.

With all these games in the book, it was now time for the final match of the fourth week. Alliestrasza was all ready for this, as she brought out a Reno Control Paladin. After week two, everyone was expecting some kind of crazy antics from J4CKIECHAN, so there weren’t that many that were surprised when he brought Renounce Darkness once again. However, when J4CKIECHAN transformed into a Shaman and actually began winning the game, everything changed.

Alliestrasza was simply unable to keep up with the high tempo J4CKIECHAN was managed to put out, so in the end, he and his Renounce Darkness Warlock managed to take Alliestrasza down and secure the 2-1 victory over Team Light.

Week 4 VOD — https://go.twitch.tv/videos/180157483


TwitchCon

Even though Team Void was ahead 3-1 in the weekly grudge matches, they had not yet won the tournament. If they truly wanted to triumph in the Oktoberbrawl, they would have to defeat the members of Team Light in one last match at TwitchCon, which would take place on October 20th.

Both teams were gearing up for this final confrontation, but then, a real-life disaster struck for Team Light. On October 17th, just days before the final matches of Oktoberbrawl, Kripparrian—who up to this point had been the one bright spot on his team—came down with a case of acute appendicitis. Fortunately, he was able to get to the hospital before any permanent damage was done, but this meant that he would be unable to travel to TwitchCon for the championship.

Team Light was forced to scramble for a worthy replacement for the Arena Master, and they found it in the form of Disguised Toast. One of, if not the most popular Hearthstone streamer on Twitch right now, Disguised Toast was the perfect choice to take Kripparrian’s place.

On October 20th, the final showdown between Team Light and Team Void began. Now, in this final best of three, there was an added twist thrown in. For every week that a team won, they’d get to give a member of the opposing team a sabotage. As Team Void had won the opening rounds 3-1, they got to give all three members of Team Light a sabotage, while Team Light only had one to apply to Team Void.

In the first game of the Oktoberbrawl Championships, Reynad ran a Control Rogue against Dog’s Hobgoblin Warlock. Team Light used their only sabotage in this game (forcing Dog to dress as a Murloc while playing) while Team Void used the first of their three (by making Reynad play with heavy gauntlets).

Dog got off to a quick start in this game, playing a Hobgoblin and three 1-attack minions on turn three for a very powerful board. Unable to deal with this board, Reynad took a lot of damage up to turn 6, when he used a Gadgetzan Auctioneer and a bunch of 0-mana spells to deal with Dog’s board. Unfortunately, Dog was able to build up a board once more, and he dropped Reynad all the way to 2 health—but then, Reynad pulled out the Yogg-Saron.

In a flurry of spells, Yogg-Saron destroyed Dog’s biggest minion and cleared the rest of his board (with the exception of a 0/2 Nat Pagle). Things were looking great for Reynad, but then, with the final spell, Yogg-Saron gave Dog’s Nat Pagle a Blessing of Kings. Reynad had no way to clear the now 4/6 minion, and he ended up losing on the following turn, giving Team Void the lead, 1-0.

In the second game of the championship, Disguised Toast took on J4CKIECHAN. Playing in place of Kripparrian, Disguised Toast brought out the Control Warlock, while J4CKIECHAN played his Renounce Darkness Warlock. Team Void also applied the second of their three sabotages in this game, which meant that Disguised Toast was only given thirty seconds to play each turn.

This game started slowly enough, but the excitement factor jumped to eleven on turn four, as J4CKIECHAN played Renounce Darkness and transformed his Warlock deck into a Priest deck. Leveraging the tempo lead gained by the reduced cost of his Priest cards, J4CKIECHAN took control of the board for a bit, but then, Toast managed to clear his minions with the help of Mogor the Ogre and a powerful Defile.

A couple turns later, Disguised Toast transformed his hero into Lord Jaraxxus, only to discover that J4CKIECHAN had a few surprises of his own. Using Shadowform (the Classic card, not the Knights of the Frozen Throne Hero Card), J4CKIECHAN began chipping away at Jaraxxus’ health, while using some board clears stolen from Disguised Toast’s deck to help defend against the Infernals summoned by Jaraxxus’ Hero Power. For several turns, it was a very tight game, but then, J4CKIECHAN failed to make the correct read on the potential burst damage in Disguised Toast’s hand, and he was defeated.

With the series tied 1-1, everything came down to the final game, where Thijs’s Control Paladin faced off against Alliestrasza’s Burn Mage. Using their third and final sabotage, Team Void forced Alliestrasza to say a Mage emote at the beginning of every turn. Fortunately, Alliestrasza was up to the task, ably reciting Jaina’s emotes as she progressed through the game.

Starting out strong, Alliestrasza seized control of the board, using her hero power and cheap removal spells such as Flamecannon to deal with Thijs’s minions. Moving into the mid-game, she started playing Ethereal Conjurer’s to discover more spells and reload her hand in preparation for a late-game Antonidas.

Unfortunately, this is where everything went wrong. Thijs was able to get a Bonemare on the board, which he promptly buffed into a 10/10 with Blessing of Kings. Alliestrasza managed to deal with this minion by freezing it with a Frost Bolt, but this was only a temporary solution, as Thijs built up a massive board with Sunkeeper Tarim. Alliestrasza did everything she could, but it wasn’t enough, and in the end, she fell to the relentless onslaught from Thijs.

With this victory, Team Void won the series and the entire Oktoberbrawl. Despite their defeat in the end, however, Team Light played really well, and overall, this was one of the most entertaining Hearthstone tournaments that I’ve seen. Hopefully, Blizzard takes some cues from this when designing events in the future (although preferably without requiring players to buy into Twitch Prime), as it could open up a lot of fun options!

TwitchCon VOD — https://go.twitch.tv/videos/183741742 (Starts 32 minutes in)

Quests vs. Death Knights

The most iconic cards of their respective expansions, the Quests from Journey to Un’Goro and the Death Knight Hero Cards from Knights of the Frozen Throne are very similar in concept. The Quests are class-specific Legendary Spells that completely define the decks they’re played in, while the Death Knight cards are class-specific Legendary Hero Cards (a new type of card) that are the cornerstone of their decks.

Because of these traits, both Quests and Death Knights have played a pivotal role in many of the decks that have appeared recently. As a result, there’s only one question left to be asked: which type of card is better? To answer this important question, I’m going to compare Quests and Death Knights in several different categories in order to see which of them is truly the most powerful card type in Hearthstone.


The Basics

Quests: One-Mana Legendary Spells, Quests always start in your opening hand so they can be played on turn one. Depending on which of the nine Quests you’re running, you’ll then have to accomplish a specific goal—such as discard 6 cards or play 7 minions with Taunt—in order to receive a powerful reward. These rewards are 5-mana cards (with the exception of the Warrior quest reward) which do incredible things.

Death Knights: Legendary Hero Cards, the Death Knights range in cost from 5-mana to 10-mana. When played, the Death Knight will actually replace your current hero, grant you 5 armor, change your hero power into something new, and somehow affect the board state in a major way (such as equipping a powerful weapon or summoning all of your Demons that died so far in the game).


Power Level

Quests: The most powerful Quests are Fire Plume’s Heart and Open the Waygate. The rewards you receive from these Quests (Sulfuras and Time Warp, respectively) are incredibly powerful and are their decks’ main win conditions. The Caverns Below used to be on this tier as well, until it got hit by the nerf bat and dropped out of contention.

As good as these Quests are, however, some of the others are on the complete opposite side of the spectrum. Lakkari Sacrifice (the Warlock Quest), Jungle Giants (the Druid Quest) and The Marsh Queen (the Hunter Quest) are all easy enough to complete, but their rewards are very weak. The Imps generated from the Nether Portal (Lakkari Sacrifice’s reward) die too easily to board clears or zoo decks, and while the 5-mana 8/8 stats of Queen Carnassa and Barnabus (the rewards for The Marsh Queen and Jungle Giants, respectively) are kind of good, their effects just aren’t very strong.

Finally, in between these six quests, there are three more (The Last Kaleidosaur, Awaken the Makers and Unite the Murlocs) which are neither insanely strong nor very weak. While the rewards from Awaken the Makers and Unite the Murlocs are good, they aren’t really game-winning. As for The Last Kaleidosaur, while Galvadon (the reward) is incredibly strong, the Quest itself is difficult to complete reliably. As a result, these three Quests—while not as useless as Lakkari Sacrifice, Jungle Giants or The Marsh Queen—aren’t the type of cards you’d run in top tier decks.

Death Knights: While only one of the Death Knights (Shadowreaper Anduin) possesses the game-ending power of Open the Waygate or Fire Plume’s Heart, all of the Death Knights are strong in their own ways. Bloodreaver Gul’dan, Malfurion the Pestilent and Frost Lich Jaina grant their users board presence and late-game healing; Uther of the Ebon Blade and Scourgelord Garrosh receive powerful weapons; Deathstalker Rexxar and Valeera the Hollow gain infinite (or near-infinite) value; and Thrall, Deathseer grants some cheap, early-game tempo.

All of these cards are very good for their mana cost, which means that they can all be safely run in nearly every deck that isn’t an aggro deck.

Winner: Tie. While the high-end Quests are more powerful than the Death Knights, most of the Quests are a bit worse. As a result, the average power level of the two types of cards is about the same.


Required Deck Dedication

Quests: By their very design, Quests require a lot of deck dedication. If you want to complete Open the Waygate, you’ll need to include lots of ways to get additional Spells, while if you’re playing Fire Plume’s Heart, you’ll need to add lots of Taunt minions. As a result, you can’t just add a Quest to your deck—you have to build your deck specifically around it.

Death Knights: Unlike Quests, most of the Death Knights require little to no deck dedication. Of course, there are things you can do to make them work better, such as include lots of cheap cards for Shadowreaper Anduin or toss in a bunch of Demons for Bloodreaver Gul’dan, but even these cards are pretty good without any support.

Winner: Death Knights. You can slot Death Knights into nearly every non-aggressive deck, which makes them a bit more versatile.


Costs

Quests: While the Quests only cost one Mana, their main cost is in cards. By keeping a Quest in your opening hand, you’re reducing the number of tools you have to work with in the early game. In some cases, this won’t make much of a difference, but in many cases (especially when playing against aggressive decks), sacrificing that card can cost you the game.

Death Knights: Death Knights cost a lot more than Quests, with the cheapest (Thrall, Deathseer) costing 5 Mana and the most expensive (Bloodreaver Gul’dan) priced at 10 Mana. Despite this, however, Death Knights don’t cost a card in your opening hand (unless you happen to pull them after the Mulligan), which means that they don’t hamper your early game while still being available late.

Winner: Death Knights. The cost in card advantage that you pay for Quests is usually more harmful than the cost in Mana paid for Death Knights.


Consistency

Quests: Because they start in your hand, getting Quests into play is incredibly easy. The trick comes in trying to complete them. For some of the Quests, such as Fire Plume’s Heart, it’s pretty easy to get all the cards you need; on the other hand, Quests like The Last Kaleidosaur can be very difficult to complete. On the whole, however, Quests are usually pretty consistent from game to game.

Death Knights: Because they don’t start in your opening hand, Death Knights can be a bit hit or miss. Fortunately, because most of them are late-game cards, you have a bit of time to go through your deck to look for them. Even with this caveat, however, Death Knights are still a bit less consistent than the Quests.

Winner: Quests. While Death Knights can be drawn with time, they can’t beat the reliability of always having your Quest in your opening hand.


Free-to-Play Viability

Quests: Because of how dependent Quests are on having just the right synergies to work with them, you’ll need to craft a lot of (potentially very expensive) cards in order to get the most out of the Legendary Spells.

Death Knights: Because of their versatility, Death Knights can be run in any deck, even if you have nothing but Basic Cards. This means that players without any money can easily build good decks around any of the Death Knights they open.

Winner: Death Knights. Unlike Quests, Death Knights can be used without any supporting cards, which makes them a lot more viable for Free-to-Play players.


Verdict:

Even though Quests have the potential to be a bit more powerful, most of them fail to live up to their expectations. Only two of the nine Quests are actually playable in reasonably high-tier decks, and those require a large amount of supporting cards. On the other hand, all nine of the Death Knights are powerful and are all viable on the ladder. In addition, Death Knights—while not quite as consistent as Quests—cost fewer resources to play, and are much easier for Free-to-Play players to build decks around.

The Grand Winner: Death Knights


So, what do you think of this competition? Do you agree that the Death Knights are the more powerful cornerstone cards, or are you a fan of the Quests? Tell me what you think in the comments below, and I’ll see you on the ladder!

Ranking the Raids of Legion

Legion, the sixth expansion for World of Warcraft, is nearing its end. The final raid of the expansion (Antorus, the Burning Throne) will release in just a couple months, and with it we shall defeat the Burning Legion once and for all. While we wait for that moment to arrive, however, I thought it’d be a great time to look back at the raids that have come so far in Legion and see how I’d rank them.


Emerald Nightmare

Number of Bosses: 7

Loot Level: 835 (LFR), 850 (Normal), 865 (Heroic), 880 (Mythic)

Description: The Emerald Dream was created by the titans as a blueprint for Azeroth itself – a verdant and perfect mirror that reflects the state of nature had it remained unspoiled by so-called civilization. For many years, the druids and keepers have noticed signs of an unsettling presence stirring within the Dream. Spurred on by the Legion and Nightmare Lord Xavius, that creeping corruption has now burst forth, and will engulf all of Azeroth if it is not rooted out at its source.


The first raid of Legion, Emerald Nightmare is located inside the corrupted world tree Shaladrassil in northern Val’Sharah. A typical introduction raid, Emerald Nightmare only featured seven bosses, all of which were pretty easy. In fact, the raid was so easy that the first guild to clear Emerald Nightmare on Mythic managed to do so in a single day, which isn’t supposed to happen.

Despite how easy it was, Emerald Nightmare was actually a pretty good raid. Even though the last boss (Xavius) was a bit underwhelming, several of the earlier fights (such as Il’gynoth, Hearth of Corruption and Cenarius) were actually very well-designed fights, and were a lot of fun to do.

The main issue I personally have with the raid, however, is the predominance of the colors red and black. On the one hand, I understand it—as the whole theme of the Emerald Nightmare is red and black—but I quickly got tired of the theme, which made the rest of the raiding experience difficult to enjoy after a while.

As a result, while Emerald Nightmare had some interesting encounters, it just wasn’t as good as the other raids in the expansion.

Rank: 4th


Trial of Valor

Number of Bosses: 3

Loot Level: 845 (LFR), 860 (Normal), 875 (Heroic), 890 (Mythic)

Description: Since Loken’s betrayal, Odyn has been trapped within the Halls of Valor as Helya plots in the shadows to claim the souls of his valarjar champions. In recent days, however, great heroes have arrived in the lands of Stormheim in the Legion’s wake. Hoping that their might and determination could tip the scales and end Helya’s reign, Odyn summons these champions for a final test.

The second raid of Legion, Trial of Valor is located inside the Halls of Valor in the southeast corner of Stormheim. The shortest raid in Legion—containing only 3 bosses—Trial of Valor is best thought of as an addition to Emerald Nightmare, rather than a completely unique experience. This is because the raid’s loot is only 10 (or 15, in the case of Helya) item levels higher than what you’d find in Emerald Nightmare at the same difficulty level, and the bosses are much more complex and difficult, a trait that is typical of the end bosses of a raid.

Both Odyn and Helya (the first and last bosses of the raid) were very difficult fights at the time, with Helya actually taking a couple days to defeat for the first time on Mythic. In addition, Trial of Valor dropped the first appearance sets from a raid, which all looked really good, even though they weren’t officially tier sets.

Finally, I really liked the atmosphere of Trial of Valor. You start out in the holy Halls of Valor, before descending into the murky depths of Helheim. This is a huge shift in scenery, which I like, and the color scheme was just easier to look at than Emerald Nightmare’s was. Overall, Trial of Valor was a pretty good raid, and it’s easily one of my favorites.

Rank: 2nd


Nighthold

Number of Bosses: 10

Loot Level: 860 (LFR), 875 (Normal), 890 (Heroic), 905 (Mythic)

Description: The largest structure in the Broken Isles, and among the grandest in all of Azeroth, the Nighthold stands as a testament to the achievements of the Nightborne civilization. Centered around the Nightwell, the fount of arcane power that has sustained Suramar for centuries, these grounds were built as a haven from the worries of the world. But as a felstorm churns above the former temple of Elune across the bay, and Gul’dan himself now resides within the palace’s walls, those worries now begin, not end, here.

The third raid of Legion, the Nighthold towers over the bay of Suramar City in the southern part of Suramar. Being the first raid to feature tier gear (armor that grants the user special bonuses if they can collect multiple pieces), Nighthold is also the largest raid in Legion so far, with 10 bosses to kill throughout the large Nightborne citadel.

Featuring some of the hardest bosses in Legion (Gul’dan, Grand Magistrix Elisande, Star Auger Etraeus and High Botanist Tel’arn are the four that immediately come to mind) the Nighthold was a lot more challenging than the raids preceding it. For some, this was a good thing, as Emerald Nightmare (the last big raid) had been a bit of a let-down as far as boss difficulty went.

For others, however, the difficulty of the fights was a bit of a turn-off, as it made quickly clearing the instance hard to do. Another contributor to this issue was the sheer number of difficult trash mobs that needed to be cleared in order to progress through the instance. As a result of these two obstacles, there were a lot of people who grew fatigued of Nighthold, and quit raiding until the next instance was released.

I actually enjoyed Nighthold, however, as it was the coolest-looking raid so far, the bosses were challenging to defeat, and there were some really epic moments (such as Illidan disenchanting Gul’dan). As a result, it’s my favorite raid in Legion, a spot that will remain secure until Antorus arrives.

Rank: 1st


Tomb of Sargeras

Number of Bosses: 9

Loot Level: 885 (LFR), 900 (Normal), 915 (Heroic), 930 (Mythic)

Description: Aegwynn used this sacred temple of Elune to lock away the defeated Sargeras’ avatar. She hoped it would remain dormant, buried deep within the earth, but the lure of power has continued to draw foul entities to this site. When Gul’dan re-entered the tomb, he tore down Aegwynn’s wards and opened a doorway for the Legion to invade. Now, the fel army tears at the vault, hoping to reclaim their master’s power.

The fourth—and most recently released—raid in Legion, the Tomb of Sargeras sits directly across from the Nighthold, near the northern tip of the Broken Shore. Containing nine bosses (which is one less than the number found in Nighthold) the Tomb of Sargeras is very similar in difficulty to Nighthold—but not in a good way.

Nearly every single one of the bosses has some kind of soak mechanic, which requires players to share a large amount of damage to prevent something worse from happening. Now, on its own, this isn’t a terrible mechanic, but when nearly all the bosses have this mechanic, it forces players to bring classes such as Rogue in order to survive. As a result, the raid has earned the nickname ‘Tomb of Soak-geras’, and is the subject of a lot of hate as a result.

Despite this, however, Tomb of Sargeras isn’t actually a terrible raid. While some of the bosses are a bit frustrating, a lot of them are actually really cool, and the whole atmosphere of the raid is pretty cool. As a result, the raid—while not quite as good as the Nighthold or Trial of Valor—is still an okay raid.

Rank: 3rd


So, what are your thoughts on this list? I know a lot of you will disagree with my picks, so please, leave a comment explaining why. Thanks for reading, and I’ll see you battling the Legion on Argus!

Hero Overview: Ana

Hero Overview is a series that introduces readers to the Heroes of the Storm. This time, we’re going to be talking about Ana, the support sniper from the Overwatch universe.

Role: Ranged Support

Universe: Overwatch

Bio:

During the Omnic Crisis, Egypt was one of the nations hit the hardest, as it lost nearly its entire military force in skirmishes against the rampaging robots. As a result of these heavy casualties, the nation was forced to rely primarily on a small battalion of elite snipers, a battalion that included a promising young woman named Ana Amari.

Naturally talented at sniping, with next-level decision-making and instincts, Ana quickly distinguished herself over the rest of her compatriots. Noticing her skill, the United Nations quickly recruited her as one of the first members of the newly formed Overwatch. Coordinating with Jack Morrison (the organization’s Strike-Commander) and Gariel Reyes (Overwatch’s overall commander), Ana Amari led many successful operations against the Omnics, and was an instrumental part in their defeat.

With the Omnic Crisis in the past, Overwatch turned its eyes to a wider variety of threats, both human and omnic in nature. In her position as second-in-command of the Overwatch Strike Force, Ana led many successful missions, and became renowned for her skill as a sniper and a leader. It was also during this time that Ana had a daughter, Fareeha (who is more commonly known as Pharah), who she imbued with all of her courage and honor.

For many years, Ana served Overwatch, but then, one fateful day, everything changed. It was a fairly routine mission—Talon had taken several innocent scientists hostage, and Overwatch was called in to rescue them. At first, the mission proceeded according to plan, but then, an unknown Talon sniper showed up and began picking off the Overwatch agents one by one. Taking careful aim, Ana shot the sniper’s mask off—and was shocked to see that the sniper was Amélie Lacroix, the former wife of an Overwatch agent.

Stunned by this revelation, Ana hesitated, and Amélie (or Widowmaker, as she is now known) shot Ana in the eye. After this incident, Ana was assumed dead—however, she actually survived the encounter, albeit with the loss of her eye and, more importantly, her conviction to fight. She was too old for this kind of work, she decided, and instead chose to go into hiding.

This retirement didn’t last long, however, for in the aftermath of Overwatch’s fall, a whole host of new threats came out of the framework and threatened the safety of the world. Realizing that she couldn’t just stand to the side and let this happen, Ana rejoined the fight, under the alias of the bounty hunter ‘Shrike’.

Operating out of an abandoned necropolis in the Egyptian desert, Ana battled the forces of Talon alone until one day, she ran into Jack Morrison (who was now the vigilante Soldier: 76) at a terrorist compound. Remembering how well they used to work together, the two united, and have been working together ever since.

Now, Ana has traveled to the Nexus, where she will protect those who cannot protect themselves and dish out vengeance for those who have fallen.


Abilities:

Ana’s trait is Shrike. Whenever she damages a non-Structure enemy with a basic attack, she deals an additional small amount of damage to that enemy over the next 5 seconds. This damage-over-time effect stacks up to 5 times, and is refreshed every time she attacks that enemy. Most of Ana’s damage comes from Shrike, as her basic abilities and auto-attacks don’t do much damage in and of themselves.

Ana’s first basic ability is Healing Dart. Ana fires a dart out of her rifle that travels in a straight line, healing the first allied Hero hit for a moderate amount of damage. This ability only has a 2 second cooldown, but it is somewhat hard to hit, so the amount of healing Ana will be able to dish out is completely dependent on how good her aim is.

Biotic Grenade, Ana’s second basic ability, throws a grenade at small area. Allies hit by the grenade are healed for a small amount and receive 25% increased healing for 3 seconds, while enemies hit by the grenade take a small amount of damage and cannot be healed for 2 seconds. This ability is great for quickly healing up your team, but it can also be used to deny a low-health enemy hero the healing he needs to survive.

Ana’s final basic ability is Sleep Dart, which fires a projectile that puts the first enemy Hero it hits to sleep for 3 seconds. This is like a stun, but if the sleeping hero takes any damage, they’ll instantly wake up. Unless you have a very coordinated team, Sleep Dart is unlikely to do much in a team-fight, but it’s great for keeping pesky dive heroes like Genji or the Butcher off your back while you’re healing up your friends.

Nano Boost is Ana’s first ultimate, and while it doesn’t work quite the same as it does in Overwatch, it is still pretty close. With Nano Boost, Ana restores a large amount of mana to a targeted friendly Hero, increases their Spell Power by 30% and causes their basic abilities to cool down 150% faster. Nano Boost works best when targeting caster heroes such as Kael’thas or ability-based dive characters like Genji, unlike Lieutenant Morales’ Stim Drone, which is designed around auto-attack heroes.

Ana’s second ultimate is Eye of Horus, which turns the support into a stationary sniper with eight shots that have unlimited range. These specialized shots hit the first Hero or enemy Structure in their path, healing allies for a large amount and damaging enemies for a moderate amount. Damage done is halved against enemy Structures. This ability is great for quickly healing up an ally who’s being ambushed, or for taking down low-health enemies as they attempt to flee.


Gameplay:

Ana is a Ranged Support Hero who puts out some of the highest burst healing in the game. At level 1, Healing Dart puts out 250 healing every two seconds, which is much better than similar burst healers such as Uther (who heals for 360 every 12 seconds). When combined with the healing bonus from Biotic Grenade, Ana’s burst healing goes up even more, which allows her to single-handedly heal allies through all but the most dangerous situations.

Despite being able to keep her allies alive with all this burst healing, Ana can only heal herself with the Biotic Grenade (which only restores a small amount of health on its own and has a twelve second cooldown). As a result, playing Ana is all about positioning properly, because if she gets caught out, she can quickly get taken down. Ana has Sleep Dart to defend her in these instances, but it’s a bit unreliable, as it is a very slow skill shot that can be completely nullified if your teammates aren’t paying attention. As a result, Ana’s best chance of survival is using her long range to heal her allies from the cover of nearby buses.

As for her heroic abilities, they are both very useful in specific situations. If Ana has a teammate who can dish out a lot of spell damage (such as Li-Ming or Malthael), Nano Boost is a very powerful ability. On the other hand, if there aren’t any good targets for Nano Boost (or you don’t have the communication to pull the ability off properly), then Eye of Horus is the better choice, as it allows you to heavily impact the game without having to rely on one of your teammates.

As far as talents go, Ana doesn’t have any clear-cut builds, and none of her talents have incredibly strong synergies with each other. That being said, nearly all of her talents are very strong on their own, so it’s really up to each individual player to decide how they want to play.

Ana is at her best when working with a team that can keep her protected in the back-line. As a result, it is often a good idea to run a pair of tanks with her, as they can help keep her safe while she heals them up with Healing Dart and Biotic Grenade. In addition, if she wants to use her Nano Boost ultimate, she’ll want a Hero who puts out a lot of spell damage, such as the characters mentioned above. Finally, if the player using Ana is somewhat inexperienced at the character, having large-bodied teammates (such as Diablo or Cho’gall) can really help to maximize the healing Ana’s putting out.

As far as counters to Ana go, any kind of dive hero (such as Genji or Illidan) works very well against her. There’s always the risk of being put to sleep, but if you can bait out and dodge the skill shot—which generally isn’t too hard—you’re free to dish out as much damage as you want for the 14 seconds until Sleep Dart comes back off cooldown. Similarly, Ana is weak against stealth assassins like Nova, as they can often burst her down before she even knows they’re there.

Despite these potential weaknesses, Ana is still a very strong support, so I strongly suggest picking her up if you’re looking for a new healer to play. Thanks for reading, and I’ll see you in the Nexus.

Escape from Tor’Watha: Chapter 7

Blackness. Everything was Blackness. Linaeum drifted through the void, lost in space and time. He distantly remembered a time before the darkness, but whenever he reached out for the memories they’d scurry away, taunting him from the edges of his mind.

Whispers clawed at his consciousness, luring him with their smooth tones and appetizing words. Linaeum fought back the best he could, but his tormenters were insidious, and every time, he found it harder to drive back the madness.

Eventually, the whispers became too hard to resist, and Linaeum was about to give in—but then, everything changed.

The first thing Linaeum felt was the heat. It wasn’t hot and ravaging like the flames of a fire, but rather warm and soothing, like the gentle touch of the summer sun’s rays. Then came the light. Radiant and beautiful, it shone through the darkness, pushing back the whispers.

Freed of his oppressors, Linaeum basked in the light, letting it cleanse him of the darkness that had surrounded his soul for so long. For what felt like hours, the former high elf Ranger absorbed the healing rays, but then, suddenly, a voice said, “Linaeum, are you there?”

For a moment, the elf feared that the voices had returned, but this voice was warm and comforting, like the light, while the whispers had reeked of the void. “I’m here,” Linaeum replied, his momentary fear dissipating like dust in the wind. “Where are you?”

“I’m all around you,” the warm voice replied cryptically. With a start, Linaeum realized that the voice was coming from the Light! “Linaeum, do you know where you are, and how you got here?”

“I remember…a battle,” the Ranger replied after several seconds of thought. “There were trolls, and elves, and…and I was stabbed! I died!” For a moment, the horrific whispers touched at the edges of the elf’s consciousness, before being driven back by the light once more.

“Yes, Linaeum, you were killed,” the Light confirmed, “But your death was not in vain. Thanks to your actions, the civilians of Suncrown Village were spared from a horrible demise. You were a hero…” A feeling of relief filled Linaeum’s mind, as he realized that his sacrifice had been worth it. Closing his eyes, he took a deep breath…which he then violently expelled, as the Light finished, “And you shall be many times in the future.”

“Wait, what?” Linaeum asked, looking confused. “But if I’m dead…”

“Your death, while noble, was premature,” the Light explained. “You still have a role to play in the fate of the universe—a role that cannot be stopped by something as simple as death. Now awake, Linaeum, and be reborn!”

The young elf opened his mouth to ask a question, but then there was a brilliant burst of light, followed immediately by total darkness. For a moment, Linaeum felt a touch of panic—had the void come to reclaim him?—but then his eyes came into focus, and he realized he was looking up at the night sky.

Taking a deep breath, Linaeum sat up—and was immediately greeted by a series of loud gasps. “Linaeum, you’re alive!” Looking around, the high elf saw Caladthras and Daelenar kneeling beside him, their faces plastered with an expression of joy. “We thought you had died!”

“I…I think I did,” the raven-haired Ranger mumbled, “I remember a void, dark and empty, a sea of madness where I drowned for an eternity.” Daelenar and Caladthras exchanged a look of worried confusion. Had their friend gone insane?

“But if you died, how are you alive now?” Daelenar asked.

“The Light,” Linaeum replied simply, “I was saved by the Light.”

Gamescom 2017 Highlights

Gamescom, one of the largest European gaming conventions, has been going on for several days at this point, featuring huge announcements from many different gaming companies. On Wednesday, it was Blizzard’s turn, and they did not disappoint. New content was revealed for nearly every one of their major franchises, all of which I’ll cover in the sections below.


Hearthstone

Knights of the Frozen Throne was released just a few weeks ago, so no one was really expecting any real announcements—which meant that everyone was surprised when the Hearthstone team debuted a new cinematic entitled “Hearth and Home”.

In this cinematic, a young girl named Ava finds a Hearthstone box on the ground in a frozen forest. Upon touching the box, Ava is teleported to the Hearthstone Inn, where she is met by a large cast of friendly characters, who tell her that ‘Hearthstone is Home’. This cinematic is of a much higher quality than the previous Hearthstone animations, and according to the Hearthstone team, several more videos and comics featuring these characters will be released in the months to come.

Heroes of the Storm

It’d been several weeks since Garrosh was released, which meant that Heroes of the Storm was due for another character. Due to the prominence of Gamescom, everyone was hoping that we’d get a famous character, and we were not disappointed, as the Archlich Kel’thuzad was revealed to be the next hero coming to Heroes of the Storm!

In addition to the arrival of this powerful new hero, Heroes of the Storm will also be getting several new skins (Dreadlord Jaina, Death Knight Sonya and Crypt Queen Zagara) and a new event, the Call of Kel’thuzad. During this event, players will be able to unlock several brand new cosmetic items by securing 30, 60 or 90 takedowns in Heroes of the Storm Matches.

Finally, it was announced that Blizzard will be releasing a 5-part documentary entitled ‘Resurrecting Kel’thuzad’, which will show much of the process involved in bringing this much-loved character to Heroes of the Storm.

Overwatch

Overwatch also got quite a lot of content, including a pair of new animated shorts and a brand new map! The map, Junkertown, is set in Australia, and showcases the home of everyone’s favorite criminal duo, Junkrat and Roadhog. Junkertown is an Escort map that starts in the Australian desert before entering a futuristic domed city full of guns and gold.

To go along with this new map, we got a new animated short entitled “Junkertown: The Plan”. This short is more of a trailer than an actual animated short—as its quality isn’t quite as good as that of the other cinematics—but it’s still a lot of fun to watch.

In addition, we got a second animated short called “Rise and Shine”, which features Mei, the Chinese climatologist. Unlike “Junkertown: The Plan”, “Rise and Shine” is an actual cinematic, and it shows what happened to Mei after she was woken up from her cryosleep.

StarCraft

StarCraft announced a brand new Co-op Commander in the form of Dehaka, the Primal Zerg leader. Like most of the other Zerg commanders, Dehaka appears as a hero on the battlefield, and while he starts out on the weak side, if he can consume enough of his enemy’s essence he will quickly turn into an unstoppable juggernaut of destruction. In addition, Dehaka commands large packs of Primal Zerg, which he can use to destroy his enemies while he builds his own strength.

World of Warcraft

Some people were hoping that the next expansion for World of Warcraft would be announced at Gamescom, but it was not to be, as we instead got a detailed description of Patch 7.3. In this patch—which is entitled “Shadows of Argus”—we are going to travel to the Legion’s homeworld and end their threat once and for all.

At Gamescom, we learned about all the story elements coming in this patch, such as the three new zones on Argus (Krokuun, Mac’Aree and the Antoran Wastes) and the two new factions, the Army of the Light and the Argussian Reach. Both of these factions have a large number of special items you can purchase from them as your reputation goes up, so grinding reputation with them will bea  top priority.

The game will also be getting a new feature called Invasion Points, where players can use large portals to teleport to Legion-controlled worlds and battle the demons there. These worlds include a Blood World, a Fire World, an Ice World and a March World, and if you can defeat all the demons on these planets, you’ll receive powerful items as a reward.

In addition, a new progression system will be coming in 7.3, which will allow you to empower your relics with the aid of a device called the Netherlight Crucible. This means that players will be able to modify their artifact relics, which should help to improve the power-level of previously weak relics.

Finally, World of Warcraft will be getting a new dungeon (Seat of the Triumvirate) and a new raid (Antorus, the Burning Throne), which will be coming out some time after the patch releases on the 29th of August.


Overall, there was a lot of really exciting stuff announced at Gamescom, and I can’t wait to check it all out! What do you all think of these exciting announcements? Leave a comment below with your thoughts!

Knights of the Frozen Throne Deck Experiments

The Knights of the Frozen Throne expansion is here, and I’ve already started work on new decks. So far, I’ve tried out several different decks and archetypes, to varying degrees of success. These are the decks I’ve created so far, as well as my thoughts on how they performed.


Freeze Shaman

Originally, I was planning to start with a Paladin deck of some kind, but then I opened both Moorabi and Thrall, Deathseer in my first few packs, I decided that I had no choice but to build a Freeze Shaman deck. Tossing in all the new Freeze cards (along with some older ones), I tried to see if the deck would work out.

At first, things went pretty well—a lot of the decks I was matched up against were Midrange, minion-based archetypes (such as Paladin and Enrage Warrior), and I easily defeated them. Things were looking great…but then I started running into the spell-centric control decks (like Freeze Mage), and things started to go downhill.

Unlike most Shaman decks, Freeze Shaman has no way to put pressure on the enemy hero outside of Bloodlust or the new Snowfury Giant. This means that, while they can eventually chip down most Midrange or Aggressive decks, Freeze Shaman has a lot of trouble against any kind of Control deck, which is what 90% of players appear to be running at the moment.

As a result, Freeze Shaman is an unpredictable deck to play at the moment. Once the meta settles, it could actually be worth playing, but for now, it’s best left to the casuals.

The Upsides: Very strong against Aggressive and Midrange decks, as it can stall and clear enemy boards for a very long time.

The Downsides: Very weak against Control decks, as it has no way to threaten lethal.

The Interesting: In one game against a Death Knight Paladin, I stole his Tirion twice with Moorabi before turning it into a Frog. I won the game a couple turns later.


Discard Warlock

Back in Journey to Un’Goro, I attempted to make a Discard Warlock—but it failed, miserably. With Knights of the Frozen Throne, however, I decided to give the archetype another go (a decision that was perhaps influenced a bit by the fact that I pulled Blood Queen Lana’thel from one of my preorder packs), and it actually worked out pretty well.

Discard Warlock has always had some trouble clearing enemy minions, but thanks to the presence of new cards like Defile and the Despicable Dreadlord, I found it a lot easier to maintain control of the board. As for Blood Queen Lana’thel, she turned out to be surprisingly good in any matchup against Aggressive or Midrange decks, as she almost always healed my hero for 6-10 health before getting killed.

Unfortunately, Discard Warlock is still pretty bad against Control decks, but even these matches are winnable thanks to the endless value of Lord Jaraxxus and the Nether Portal. As a result, the deck actually did pretty well overall, and helped me to climb several steps up the ladder.

The Upsides: Very strong against Aggressive and Midrange decks, as it has several strong Taunt minions and some powerful healing in the midgame.

The Downsides: Somewhat weak against Control Decks. In addition, if you get unlucky with Discards, the deck will suddenly become laughably bad.

The Interesting: In one game against a Rogue, I was at 4 health, but then the Rogue used Betrayal on my 7-attack Blood Queen Lana’thel. Lana’thel proceeded to kill off two of my weaker minions and healing me for 14, which put me out of range of the Rogue’s attacks.


Enrage Warrior

After playing a game where I discarded my Lord Jaraxxus, Blood Queen Lana’thel and both of my Despicable Dreadlords in a single turn, I was feeling pretty angry, so I decided to go play Enrage Warrior. Sadly, I had not opened the new Warrior Hero, Scourgelord Garrosh, but I had collected Rotface (the new Warrior Legendary) and most of the new Enrage-synergy cards, so it wasn’t long before I had made a complete deck.

Thrilled with my new creation, I headed into ranked—and things did not go well. My early game minions were often too weak to contest the board against my foe’s plays, so I was never able to get a large enough board to take advantage of powerful Midrange minions like the Dark Revenant. Then, in the late-game, I attempted to use Rotface to gain tempo, but in most cases, he failed to really accomplish anything.

It should be noted, however, that I do not own either Scourgelord Garrosh or the Classic Legendary Grommash Hellscream. As a result, I ran out of plays in the late-game, a situation that could have been rectified by either of these minions. As a result, I don’t want to completely write the deck off—but I will say that if you want to play the deck, you’ll need to be prepared to spend some dust.

The Upsides: Can occasionally beat other Midrange deck. I wouldn’t count on it though.

The Downsides: Loses to pretty much everything.

The Interesting: If you’re somewhat lucky, Rotface can have some very interesting results. For example, there were a few games where I ended up with four or five powerful Legendary minions on the board.


Handbuff Paladin

First introduced in Mean Streets of Gadgetzan, the Handbuff Paladin Archetype focuses on using cards such as the Grimestreet Enforcer and Smuggling Run to increase the power of its hand. Back in Mean Streets, the archetype was absolute garbage, and any Paladins who attempted to make it work were quickly driven out of town in defeat.

In Un’Goro, the archetype had a couple bright moments, but it was too weak against Aggressive decks such as the omnipresent Pirate Warrior to actually accomplish a whole lot. With the arrival of Knights of the Frozen Throne, however, the meta has—at least temporarily—slowed down quite a bit, which gives Handbuff Paladin a chance to thrive.

Using the classic Handbuff cards mentioned above, along with new cards such as Bolvar, Fireblood and Uther of the Ebon Blade, I brought the deck into standard—and actually had a surprising amount of success. Thanks to the increased power of minions affected by the Handbuffs, the deck performed very well against other Midrange decks. In addition, I also won several games against Aggro decks like Pirate Warrior, as the Lifesteal effects from cards such as the Chillblade Champion or Corpsetaker allowed me to outheal the incoming damage.

As for Control Decks, the matchups are often relatively even. Against most variants of Control, Handbuff Paladin actually performs pretty well, but it really struggles against any type of Control Priest deck, as they have too many ways to Destroy or Silence large minions.

The Upsides: Is very strong against other Midrange decks, and is slightly favored against Aggressive and Control decks.

The Downsides: Is very weak against Control Priest, which is seeing a bit of play in the meta right now.

The Interesting: Prince Keleseth (the 2-mana Legendary who gives all the other minions in your deck +1/+1 if you don’t have any other 2-cost cards) is surprisingly good in this deck. This is because the deck doesn’t normally run any 2-mana cards, so Keleseth can always get his Battlecry off.


Evolve Shaman

As noted above, my first attempt to create a viable Shaman deck failed pretty badly. Freeze Shaman, while a fun enough deck to play, just isn’t strong enough in the current meta to overcome everything that is stacked against it. Freeze Shaman isn’t the only Shaman archetype to come out of Knights of the Frozen Throne, however, which is why I turned my attention to Evolve Shaman.

Starting with the new Shaman Hero Card (Thrall, Deathseer) I added as many Evolution synergy cards as I could, such as the Dopplegangster from Mean Streets of Gadgetzan and the Saronite Chain Gang from Knights of the Frozen Throne. Finally, I added a pair of Bloodlusts (for the finishing burst), and I headed into Standard to see how it would go.

I started playing around rank 15, and after playing ten or more games, I was still at rank 15. This was due to the fact that Evolve Shaman—while a lot of fun to play if it works out correctly—is incredibly inconsistent. In several of the games I played, I didn’t draw into any of my Evolution cards, and even when I did, I often struggled to develop a board that could be Evolved. As a result, I ended up losing just over half of the games I played, which means that ultimately, the deck was unsuccessful.

It should be noted, however, that a large part of my strugglers were due to terrible draws or bad Evolves. In the games where these random effects actually worked out correctly, I had a lot more success (and a lot of fun). Because of these factors, I wouldn’t completely discount this deck yet, but I also wouldn’t recommend playing it if you solely are interested in climbing the ladder.

The Upsides: Can be very strong if the draws work out, and if you pull off a monster Evolve it’s one of the coolest things in the game.

The Downsides: If the draws or Evolves don’t work out, the deck is incredibly weak, and will lose to nearly everything.

The Interesting: I created all kinds of crazy minions with the evolution effects, and ultimately had a lot of fun.


These are the main decks I’ve been playing so far. Most of them aren’t particularly good, but despite that, they’ve all been a lot of fun to play. As a result, I’d highly recommend you play as much Hearthstone as you can in the next week or so, because this is one of the most fun opening week metas I’ve ever played in!

Knights of the Frozen Throne Meta Predictions

The Knights of the Frozen Throne expansion has nearly arrived, but before it does, I thought I’d write down my thoughts on what I think the meta will become in the next few weeks.


Druid

Druid is a class that has had many identities over the years. Back in Classic, the main focus of Druid was around cheating out large minions with mana-ramping cards such as Wild Growth or Innervate. Then, after all the nerfs before Whispers of the Old Gods came out, Druids began experimenting with token decks such as Egg Druid. These token deck worked great up until Mean Streets of Gadgetzan, when the Jade Golem archetype appeared.

Since then, the meta has been about evenly split between Jade Druid and Token Druid, but now, with the arrival of Knights of the Frozen Throne—honestly, I don’t think anything is going to change. From everything that I’ve seen, it looks like we’re going to be heading for a more control-centric meta, a meta that Jade Druid excels against, thanks to its ability to generate insane value over time.

In addition, a lot of the new cards coming in KotFT fit very well into a Token Druid deck (Crypt Lord, Fatespinner and Strongshell Scavenger seem particularly interesting), which should help the deck survive the coming weeks. The new Druid Hero Card (Malfurion the Pestilent) also seems like it could be good in a Token-style deck, but its 7-mana cost may make it a bit too clunky for some of the more streamlined lists.

On the other hand, the Taunt Druid archetype that Blizzard seems to be pushing is unlikely to work well. Despite the power Hadronox (the new Legendary minion) potentially represents, it’s still just a 9-mana 3/7 when you play it, which is very weak in comparison to what a Jade Druid could drop. In addition, a lot of Druid’s most powerful Taunt minions (such as Ancient of War and Druid of the Claw) don’t actually count as Taunt minions, which severely dampens the card’s potential power.

The Decks We Will See: Jade Druid, Token Druid

The Decks We Won’t See: Taunt Druid

Cards to Watch Out For: Strongshell Scavenger, Crypt Lord

Notes: If Jade Druid becomes too common, it’s possible that other decks will start running Skulking Geist, which will cause Jade Druid to become unplayable.


Hunter

“If the face goes Taunt, me still go face,” has been the cry of Hunters everywhere ever since Hearthstone launched several years ago. Since then, Blizzard has done everything in its power to push the deck towards a Control archetype, but up until now, nothing they’ve tried has succeeded. With the arrival of Knights of the Frozen Throne, however, it appears that Control Hunter might finally be a thing.

Thanks to cards such as Deathstalker Rexxar and Professor Putricide, Hunter finally has a way to generate value, which is something they’ve always lacked. In addition, they have gained some powerful new board clears (such as the Exploding Bloatbat and Deathstalker Rexxar’s Battlecry), some single-target removal (Toxic Arrow), and even a way to heal (Bloodworm). Will it be enough to push Control Hunter over the edge into the realm of playability? I think it will be.

The Decks We Will See: Control Hunter, Midrange Hunter

The Decks We Won’t See: Face Hunter

Cards to Watch Out For: Deathstalker Rexxar, Professor Putricide, Bloodworm

Notes: Bloodworm is very interesting in this deck, because while it isn’t strictly a Hunter Card, it is a Beast, which means that Hunters could use cards like Houndmaster to transform it into a genuinely powerful way to heal themselves.


Mage

In the recent Journey to Un’Goro expansion, Mage was given two new archetypes to play with: Elemental Mage and Quest Mage. Both failed miserably at the time, but now, thanks to Knights of the Frozen Throne, it appears that they might have received a second chance at viability.

The new Mage Hero Card, Frost Lich Jaina, causes all your Elementals to gain Lifesteal. Now, at first, this might sound somewhat underpowered, but you have to remember that Mage is a class without any natural way to heal in the Standard Format. With Frost Lich Jaina, however, suddenly, every Elemental represents a few points of healing, which is something that cannot be overstated.

As for Quest Mage, the vast numbers of new Freeze effects that are being added will buy Mages the time they need to get their Quest complete, at which point they are free to destroy their opponents however they see fit.

As for the other, more common Mage decks (such as Secret Mage and the old Freeze Mage), there’s a good chance that they’ll all survive, as they’re getting a lot of support in the upcoming expansion. Overall, things are really looking up, which means that it should be a great time to be a Mage.

The Decks We Will See: Elemental Mage, Quest Mage, Secret Mage, Freeze Mage.

The Decks We Won’t See: Mech Mage, because it doesn’t exist anymore.

Cards to Watch Out For: Frost Lich Jaina

Notes: Sindragosa (the new Mage Legendary) seems interesting, but it’s unlikely to see a lot of play, as it doesn’t really fit into any of the currently established archetypes.


Paladin

In the days before Journey to Un’Goro, Paladin was a dumpster-tier class. The handbuff mechanic introduced in Mean Streets of Gadgetzan had utterly failed, and the old Control Paladin archetypes were useless against the dangers of Pirate Warrior. With the arrival of JUG, however, Paladin’s fortunes were completely reversed thanks to the addition of powerful cards such as Sunkeeper Tarim, Spikeridged Steed and Vinecleaver. Now, Paladin is one of the top decks in the game, and this will not change in Knights of the Frozen Throne.

Uther of the Ebon Blade (the new Hero Card for Paladin) is one of—if not the—strongest Hero Card coming to the game, as it makes decks such as Control Paladin and Midrange Paladin even harder to kill. Meanwhile, Paladins are receiving a host of new Divine Shield minions (including Bolvar, Fireblood, the new Legendary), which should make their ability to control a board even stronger than before.

As for Aggro Paladin, there are a lot of people who believe that these decks are going to become even stronger. I would heartily disagree, however, as I think the meta is going to become such that Aggressive Paladins have trouble maintaining a board. Without the reach that decks such as Pirate Hunter or Face Shaman have, Paladins won’t be able to close out games, and they’ll lose a lot more games than they win.

The Decks We Will See: Control Paladin, Divine Shield Paladin

The Decks We Won’t See: Aggro Paladin, Murloc Paladin

Cards to Watch Out For: Uther of the Ebon Blade, Blackguard

Notes: A lot of people don’t think Bolvar, Fireblood will amount to anything, but I don’t think it can be written off quite yet, and it wouldn’t surprise me if it ends up being one of the best cards in Paladin.


Priest

While Priests are supposed to be associated with healing, they have always had a knack for stealing their opponents’ cards, a skill that has been turned up to 11 in Knights of the Frozen Throne. With cards such as Devour Mind, Embrace Darkness and Archbisop Benedictus, Priests are able to rob their opponents of more cards than ever before.

At first glance, this might not seem like a good thing, but then you have to remember the power level of the cards we’re going to be looking at. Knights of the Frozen Throne is bringing a large number incredibly strong cards (including the Hero Cards) to the table, all of which Priests would be glad to get their hands on. As a result, a lot of these theft cards (especially Devour Mind) seem like they might actually make a pretty large difference in the meta to come.

In addition, the new Priest Hero Card, Shadowreaper Anduin, is exactly what the Shadow Priest decks have always been looking for. Providing a way to control the board that was previously difficult to obtain in Shadow Priest, this card could make the low-tier deck actually viable.

The Decks We Will See: Control Priest, Steal Priest, Shadow Priest

The Decks We Won’t See: Dragon Priest

Cards to Watch Out For: Shadowreaper Anduin, Devour Mind

Notes: A lot of people are predicting that Priest will be the best class in the upcoming, and honestly, I think they might be right.


Rogue

For the past several expansions, Rogue has been suffering a bit of an identity crisis. Unlike most of the other classes, Rogue hasn’t had a solidifying theme in years, and while Quest Rogue was a decent deck, it sprang out of a single Rogue card from Un’Goro, and only used one or two others. In Knights of the Frozen Throne, this unfortunate trend appears to have been stopped, as Rogues got a lot of cards dealing with weapons.

With the Shadowblade (a new weapon), Leeching Poison (a weapon modifier) Doomerang (a Spell that uses your equipped weapon to take out minions) and even more, it appears that Rogue is heavily invested in a weapon archetype…which is unfortunate, because weapon decks have never worked out well.

As long as cards such as the Acidic Swamp Ooze exist, weapons are going to get destroyed, no matter how much you buff them. As a result, a weapon-based Rogue deck is simply too difficult to make much use of, so many of these cards will likely be pointless.

That doesn’t mean that Rogue is completely useless, however, as they got some very powerful cards in the form of their Hero Card (Valeera the Hollow) and their Legendary Minion (Lilian Voss). Both cards work very well in a Spell-centric Miracle deck, which could turn out to be very good in the upcoming meta. As a result, Rogue shouldn’t be written off quite yet, though I wouldn’t advise putting too much faith in them in the first few weeks.

The Decks We Will See: Miracle Rogue

The Decks We Won’t See: Weapon Rogue

Cards to Watch Out For: Valeera the Hollow, Lilian Voss

Notes: The cards from Un’Goro that generate the 1-mana Razorleaf Spells synergize very well with Lilian Voss, as they provide lots of Spells for her to transform.


Shaman

Shamans are well known as the masters of the Elements, and so in Journey to Un’Goro, they got lots of Elementals. Unfortunately, the Elemental Tribe turned out to be useless, so Shaman was kind of out of luck. Learning from their mistakes, the Hearthstone Team completely abandoned the Elemental Tribe for Knights of the Frozen Throne, and instead focused around Freeze Effects.

From minions that freeze others (like the Brrrloc and the Voodoo Hexxer) to spells that freeze minions and buff them (Cryostasis) to minions that add frozen minions to your hand (Moorabi), Shaman is getting a lot of Freeze effects. Despite all these new cards, however, one question still remains: is Freeze Shaman good? Honestly, I have to say no.

In-and-of-itself, the deck isn’t bad, but there are way too many cards that have a very weak statline to compensate for their ability to Freeze. This just isn’t good enough (generally speaking), and when the deck’s new Legendary minion is a 6-mana 4/4, you know you’re in trouble.

On the other hand, the new Hero Card (Thrall, Deathseer) actually looks pretty good, and it will likely be a staple in many of the Evolve Shaman decks (which are actually quite prevalent). As a result, Shaman isn’t completely dead yet—but they didn’t do too well in this set either.

The Decks We Will See: Evolve Shaman

The Decks We Won’t See: Freeze Shaman, Evolution Shaman

Cards to Watch Out For: Thrall, Deathseer

Notes: In addition to Thrall, Deathseer, Evolve Shaman got several new cards that support the archetype, such as the Saronite Chain Gang, a pair of 4-mana 2/3 Taunts that turn into 6-mana minions when Thrall, Deathseer Evolves them.


Warlock

For the longest time, Warlock was king. If it wasn’t Handlock destroying enemy boards, it was Zoolock flooding them or Renolock healing out of their range. Things were good for Gul’dan—but then, the Year of the Mammoth arrived. Many of Warlock’s best cards rotated out, and in exchange, they got the Discard mechanic…which is absolutely terrible.

The Legendary minion and Quest from Un’Goro were both unplayable during the Journey to Un’Goro meta. With the arrival of Knights of the Frozen Throne, however, the time has come to see if Discard will actually be a viable strategy. To be honest, I highly doubt it, but time will tell.

In the meantime, Warlocks actually got a very good Hero Card. Bloodreaver Gul’dan (which resummons all the Demons that died this game) is a very strong card for rebuilding a fallen board state, and it also has a lot of tools dedicated to keeping the Warlock alive. In addition, Warlocks got one of the most powerful AOE spells in the game (Defile), which means that Gul’dan might actually regain a semblance of his former power in the upcoming patch.

The Decks We Will See: Control Warlock

The Decks We Won’t See: Discard Warlock

Cards to Watch Out For: Bloodreaver Gul’dan

Notes: The Despicable Dreadlord is also a very strong new card, and since it’s a Demon, it synergizes well with the new Hero Card.


Warrior

“Aaargh, I’m in charge now,” is the cry of the Pirate Warrior, as they send Patches the Pirate in to claim yet another victory. Ever since the Mean Streets of Gadgetzan, Pirate Warriors have been dominating the meta—but now, in the frozen wastes of Northrend, things might finally turn around.

In Knights of the Frozen Throne, Warrior didn’t get a single aggressive card. Instead, they got lots of cards relating to damaging their own minions, including their Legendary, Rotface. Even their Hero Card, Scourgelord Garrosh synergizes very well in an Enrage Warrior deck like this, as his hero power deals one damage to all minions. As a result, Enrage Warrior might finally be a deck worth exploring.

In addition, it appears that the old Control Warrior may be making a return, thanks to cards such as Dead Man’s Hand, which provides Warrior with a lot more resources than they’d normally have access to. Overall, however, it’s hard to say for sure, so it will most likely be some time until Control Warrior’s place in the meta is fully realized.

The Decks We Will See: Enrage Warrior, Control Warrior

The Decks We Won’t See: Pirate Warrior (Hopefully!)

Cards to Watch Out For: Scourgelord Garrosh

Notes: Despite the meta being completely against Pirate Warrior, there’s honestly a good chance that it will make a comeback simply because it’s so solid.

Hero Overview: Stukov

Hero Overview is a series that introduces readers to the Heroes of the Storm. This time, we’re going to be talking about Stukov, a Melee Support from the StarCraft Universe.

Role: Melee Support

Universe: StarCraft

Bio:

Alexei Stukov, the infested Admiral that leads the Zerg Spacefleet, is a warrior feared throughout the entire Koprulu Sector. Stukov was not always the monster he is now, however—in fact, he was once a normal human, and was actually born on the human homeworld of Earth.

When he was a young man, Stukov and his friend (a young man named Gerard DuGalle) joined the United Powers League, a powerful totalitarian organization that ruled the Earth with an iron fist. Constantly pushing to get ahead, Stukov quickly rose in the ranks, and before long, he was in charge of a large research facility, where he looked for ways that the UPL could increase the effectiveness of their troops in the field.

During this time, Stukov also led United Powers League troops to several great military victories, and received many medals for his valor in combat. Before long, Alexei Stukov was one of the best-known heroes on the planet, and it looked like he was destined for a high-ranking role in the UPL government—but then, the Zerg and Protoss appeared and began attacking settlements in the Koprulu Sector.

In order to save the human colonies in this dark hour, the UPL reformed into the United Earth Directorate and prepared to send a fleet to the Koprulu Sector. Thanks to his extensive combat experience and research work, Stukov was promoted to Vice-Admiral and made second-in-command of the expedition, which was led by his friend, Admiral DuGalle. Stocking up on supplies and weaponry, the fleet set out for the edge of the galaxy, where the Koprulu Sector lay.

Arriving at their destination after a long trip, Stukov witnessed the Zerg attack a Terran Dominion base from his command ship, the Battle Cruiser Alexander. Stukov wasn’t overly interested in watching the chaos, as he’d seen hundreds of tapes on the creatures, but DuGalle forced the man to watch the battle, as he believed that if Stukov were to watch the chaos that would occur if they failed, the Vice-Admiral’s resolve would harden, and he’d be a much more formidable force against the Zerg. This strategy worked out, and Stukov resolved to dedicate his life to exterminating the Zerg threat.

Sending his fleet to the planet Braxis, Stukov attempted to blockade the Protoss, who raided the planet for unknown reasons. Stukov was not prepared for the power and craft of the ancient alien race, however, and the Protoss raiders managed to penetrate the blockade and escape into space. Angered by this, and determined to discover why the Protoss had attacked the planet in the first place, Stukov sent an assault force down to conquer the capital city of Boralis.

Unfortunately, the UED forces were unable to complete their goal—because of a lack of vespene gas—but they did meet the Confederate Resistance Forces and their leader, a man named Samir Duran. Duran had been part of the old Terran Confederacy, but the rise of the Terran Dominion, Duran had dedicated himself to stopping Arcturus Mengsk’s regime. Seeing the UED as a potential ally in this effort, Duran offered Stukov the services of his troops, who were small in numbers but had insider knowledge of the Koprulu Sector that the UED lacked.

Seeing these men and their knowledge as valuable assets, Stukov agreed to let them join his forces, and together, they rendezvoused with the main UED expedition and attacked the Dylarian Shipyards, the main hub for the Terran Dominion’s fleet. Under Stukov and DuGalle’s expert leadership, the forces of the UED managed to capture all the battle cruisers stored at the Dylarian Shipyard, an act that severly hampered the UED’s human enemies in the Koprulu Sector.

With this taken care of, Stukov proceeded to Tarsonis—the former capital of the Terran Confederacy—and recovered a Psi Disrupter similar to the one Mengsk had used to conquer the planet. Bringing the device back to the laboratories on Braxis, Stukov began studying it and its potential wartime uses against the Zerg.

With the help of the battle cruisers stolen from the Dylarian Shipyard, DuGalle and Stukov continued their assault—but before long, things started to go drastically downhill. Gaining the help of Raynor’s Raiders (a human rebel group), the Protoss and even some of the Zerg, Mengsk started to strike back against the UED forces.

Horrified by these events, Stukov began to doubt the UED’s chances of success—and then, in the midst of this chaos, Stukov discovered that Samir Duran was allied with the Zerg, and was likely among the Terrans that had been infested by the vile aliens. Retreating back to Braxis, Stukov activated the Psi Disrupter in the hopes of revealing the traitor.

This action backfired when Duran told DuGalle that Stukov had given up the fight, which enraged the Admiral. Abandoning the fight against Mengsk for the time being, the UED forces attacked Braxis. Stukov’s personal forces held out for a while, but eventually, they were overrun, and Stukov was killed by Duran.

As it turned out, Stukov’s death was only temporary, for only a short time after the defeat on Braxis, the former Vice-Admiral was resurrected by a Zerg cerebrate named Kaloth. Together, Stukov and Kaloth gained control of a large Zerg swarm and proceeded to recapture much of the planet with the help of some Terran mercenaries.

Despite being newly-resurrected, Stukov retained much of the tactical knowledge from his prior life, and he led the Zerg to many victories. This success ended up backfiring, however, as Artanis—a powerful leader of the Protoss—discovered Stukov’s actions and united with Raynor’s Raiders to assault Braxis.

Defeating Stukov’s young brood, the Protoss injected the infested Terran with a serum that caused the infestation caused by Kaloth to temporarily disappear. In command of his mind and body once again, Stukov escaped the planet with the strike force moments before the entirety of Braxis was burned from orbit by the Protoss Fleet.

Knowing that the antidote was only temporary, and that Stukov could end up losing control of his brain again, the former Vice-Admiral was sent to Skygeirr Station, where he was experimented on by Emil Narud for many years. Eventually, however, the infested Terran managed to contact Sarah Kerrigan, the leader of the Swarm, and told her about the secret lab and its true purpose: creating powerful Protoss/Zerg hybrids capable of wiping out all life in the universe. Recognizing the threat these creatures presented, Kerrigan attacked the research station, freed Stukov and destroyed the hybrids before they could be utilized.

Destroying the research station and slaying Narud, Kerrigan and Stukov united to attack Korhal, the seat of the Terran Dominion’s power. Joining forces with Raynor’s Raiders, the Zerg destroyed the Dominion forces and Kerrigan killed Arcturus Mengsk, the man who had left her behind to die on Tarsonis.

Several years later, Stukov joined Kerrigan, Artanis and Raynor in an assault on the Void, where he ran into Narud, who had been resurrected in the service of the Dark Lord Amon. Defeating Narud’s forces, Stukov personally slew the man who had tormented him for so long, before assisting Kerrigan and the others in defeating Amon once and for all.

With the Koprulu Sector saved, Stukov has now turned his attention to the Nexus, which he intends to infest and conquer in the name of the Swarm.


Abilities:

Stukov is a durable support hero who spreads powerful heals over time through his allies and damaging, slowing damage over time effects between enemies. The healing aspect of this is accomplished with his first ability, Healing Pathogen, which infects an allied hero with a disease that heals them for a small amount over 4.5 seconds. This disease will spread to a nearby allied hero every 0.75 seconds, and can continue to spread until every member of Stukov’s team has been healed. The healing from Healing Pathogen is relatively small, but it’s great for topping off heroes outside of team fights.

Stukov’s second basic ability, Weighted Pustule, is the damage and crowd-control half of his disease kit. With this ability, Stukov hurls a projectile that deals light damage to all heroes in its path and infects them with a disease that slows their movement speed by 5% immediately and ramping up to 50% after three seconds. This ability doesn’t do a lot of damage on its own, but it is great for securing kills or helping allies get out of harm’s way.

Now, while Healing Pathogen and Weighted Pustule are decent abilities in and of themselves, they draw their true power from Stukov’s trait, Bio-Kill Switch. When Stukov activates his trait, it immediately removes his diseases from all afflicted targets and does either a large burst of healing (to heroes affected by Healing Pathogen) or a small amount of damage and applies a 70% slow (to enemies recently hit by the Weighted Pustule). Bio-Kill Switch grants Stukov a surprisingly large amount of burst healing, in addition to some very powerful crowd control.

Unlike Healing Pathogen and Weighted Pustule, Stukov’s third and final basic ability, Lurking Arm, is unconnected to his trait. Plunging his army through the ground, Stukov creates a large pool of creep that deals a moderate amount of damage per second and silences all enemies in the area. This ability is very good for zoning enemies out of important areas, as it can last indefinitely. Unfortunately, Stukov cannot move while channeling it, so correct positioning is everything.

Both of Stukov’s heroic abilities are centered around creating separation, but in very different ways. For his first heroic, Massive Shove, Stukov shoves his infested arm out in a targeted direction. If this shove makes contact with an enemy hero, Stukov stuns the target and pushes them until they hit an unpathable object such as a wall or fort, at which point they take a heavy amount of damage. While Stukov is shoving the enemy hero, he gains 50 Armor (reducing all damage taken by 50%), but he isn’t Unstoppable, so a simple stun can end the push. Massive Shove has a relatively short cooldown (only 20 seconds) so it’s great for getting rid of pesky dive heroes.

Stukov’s second heroic ability, Flailing Swipe, serves a similar purpose as Massive Shove. With this ability, Stukov swings his arm outwards three times, with each swing going farther than the ones before. Enemies hit by this ultimate take a small amount of damage and are knocked away, so Flailing Swipe is great for pushing back entire teams that attempt to dive onto Stukov during a fight.


Gameplay:

Stukov is a hard-hitting Melee Support who uses diseases to heal and damage his enemies and his infested arm for crowd control and disengaging. With Healing Pathogen, Stukov can easily keep his team healthy—as long as they stay together—and if anyone gets too low, he can pop Bio-Kill Switch to put out a burst of healing.

On the damage/crowd control side, Stukov has Weighted Pustule for slows, Lurking Arm for silences and wave clear, and his ultimates (Massive Shove and Flailing Swipe) for protecting himself and teammates from dive heroes such as Illidan or the Butcher.

As befitting a support of his complexity, Stukov has a pretty complex talent tree, with two unique builds: a build that deals damage and slows with Weighted Pustule and Bio-Kill Switch and a build that uses the power of the Lurking Arm to control the battlefield and execute vulnerable heroes.

For the Weighted Pustule build, Stukov takes either Fetid Touch (a quest that decreases the cooldown of Weighted Pustule after hitting enough heroes) or Poppin’ Pustules (a quest which causes Weighted Pustule to do area damage upon detonation, as long as Stukov can detonate 10 of them without dying) at level one. Fetid Touch is the safer option, but if he’s not being targeted by enemy dive heroes—and if his team isn’t having trouble in the healing department—Poppin’ Pustules has a higher payoff.

At level 4, Stukov can take any talent, and at level 7, Stukov takes either The Long Pitch (which doubles the range of Weighted Pustule) or Targeted Excision (which reduces the cooldown of Bio-Kill Switch to 5 seconds if Stukov detonates exactly one Weighted Pustule). While Targeted Excision has the bigger payoff, it can be very difficult to get usage out of, so The Long Pitch is generally better.

At level 10, both heroic abilities are usable, and at level 13, Stukov has Virulent Reaction, which roots enemy heroes if Bio-Kill Switch detonates a Weighted Pustule on them while they’re standing inside Lurking Arm. Now, this may sound really complicated to pull off, but it actually isn’t too bad, and can lead to some quick takedowns against dive-oriented heroes.

At level 16, this build can take Eye Infection (which increases the damage of Weighted Pustule and causes it to blind the target when detonated) but in many cases, Stukov will just take one of the other three talents, which greatly increase his healing capabilities.

Finally, at level 20, Stukov can either take one of the heroic ability upgrades, or he can take Bio-Explosion Switch, which causes Bio-Kill Switch to also detonate Lurking Arm, which applies a Weighted Pustule to all enemy heroes inside and silencing them for 2 seconds. This is a very powerful talent, and will be the go-to talent for this build in nearly every case.

The Weighted Pustule build is great on maps with large, open spaces (such as Battlefield of Eternity or Blackheart’s Bay) as it allows Stukov to poke at enemies from long range. It’s also good at dealing with dive compositions, as Stukov can slow enemy dive heroes down long enough for them to be destroyed by his teammates. On the other hand, however, if Stukov is fighting on a smaller, tight map with lots of corridors (like Cursed Hollow or Haunted Mines), the Lurking Arm build is often a bit better.

At level 1, the Lurking Arm build takes Growing Infestation, which increases the size of Lurking Arm by 50% over 2.5 seconds. This allows Stukov to control a much larger area with this ability, and is essential to the success of the build.

At level 4, Stukov can take whatever he wants, but at level 7, he has two distinct choices: Within My Reach (which increases the range of Lurking Arm by 50%) and It Hungers (which restores mana and decreases Lurking Arm’s cooldown ever time it hits an enemy hero). Generally speaking, Within My Reach is the best talent to take at this level, but if Stukov is using Lurking Arm a lot—as in, every couple seconds—then It Hungers can work out.

Like with the Weighted Pustule build, Stukov can take whatever he wants at level 10, but at level 13, he gets another choice between Low Blow (which massively increases the damage of Lurking Arm against low-health heroes) and Lingering Spines (which causes Lurking Arm to persist for a couple seconds after Stukov stops channeling). Low Blow can allow Stukov to finish off low-health enemies, but Lingering Spines is good in more situations. As a result, deciding which one to take will be on a game-to-game basis.

At level 16, Stukov takes any of the healing talents (depending on the situation he’s been facing), and at level 20, he either takes one of the heroic ability modifiers or Bio-Explosion Switch. All of these are equally good for the build, so deciding which to take is purely a matter of personal preference.

Stukov is a great healer for slow, methodical teams that stick together at all times after level 10, as his Healing Pathogen allows him to keep his teammates topped up as long as they stay relatively close together. On the other hand, Stukov is a very poor healer for dive-oriented teams, as he has trouble keeping up with their natural tendency to spread out.

In combat, Stukov is strong against most enemy dive heroes, as he can slow them down with Weighted Pustule before finishing them off with his auto-attacks—which do the most damage of any hero in the entire game. In addition, Stukov can use Massive Shove to throw characters such as Illidan or Malthael back into Stukov’s forts, where they are quickly melted by Stukov’s defensive structures.

On the other hand, Stukov is weak against ranged dps such as Jaina or Li-Ming, as they can outrange most of his abilities (unless he took The Long Pitch at level 7). He is also pretty weak against stun-oriented compositions, as the only way to escape a coordinated team effort to bring him down is with Flailing Swipe, which can only be used once every 80 seconds.


As long as Stukov stays out of trouble, however, he can output some of the highest healing amounts in the game, which means that he’s a great healer to take in most situations, and I highly recommend him.

Hope you enjoyed the article, and I’ll see you in the Nexus!

Hero Overview: Diablo — Part 2

Hero Overview is a series that introduces readers to the Heroes of the Storm. This time, we’re going to be talking about Diablo, a Melee Warrior from the Diablo Universe.

(This post is a continuation from last week’s article, which can be found here: http://nexustipsandtales.com/hero-overview-diablo-part-1/)


Gameplay:

Diablo is a durable Melee Tank who uses his massive hitbox and numerous crowd-control tools to dive the enemy team and mess up their positioning. With Shadow Charge, he can get into the team fight quick before using Overpower to pull a vulnerable enemy hero out of position. In addition, at 100 souls Diablo has the most health of any hero in the entire game (including Cho’Gall), so he can last a surprising amount of time in the middle of a battle.

Diablo has a very diverse talent tree, as for three of the first four talent tiers (levels 1, 7 and then heroic abilities at 10) all of the talents can fit into any playstyle. At levels 4, 13 and 16, however, the talents promote two very different builds: the Shadow Charge/Overpower build and the Fire Stomp build. Both of these builds play out very differently, and are good or bad in different situations.

For the Shadow Charge/Overpower build, Diablo takes the From the Shadows talent at level 4 (which massively increases the range of Shadow Charge) and the Devastating Charge talent at level 13, which causes Shadow Charge to do up to 15% percent of the target’s health in damage if Diablo can knock them into a wall. This can amount to an insane amount of damage, especially when combined with the level 16 talent, Domination, which resets the cooldown of Shadow Charge every time you use Overpower.

For the Fire Stomp build, Diablo can take anything at level four, before selecting the Fire Devil (which increases Diablo’s auto-attack damage and gives him a damage aura every time he uses Fire Stomp) or Hellfire (which causes Fire Stomp to deal extra damage for every hero it hits) talents at level 13. Fire Devil is generally the better choice, as it provides Diablo with more consistent damage, but Hellfire can work if the other team is clumping up enough. Then, at level 16, this build takes Debilitating Flames, which slows enemies hit by Fire Stomp for 15-30% (depending on how many times they get hit) for 2 seconds.

The Shadow Charge/Overpower build is very strong on maps with tight lanes and jungle, such as Tomb of the Spider Queen and Cursed Hollow. On large, open maps such as Battlefield of Eternity, however, the Fire Stomp build will often pay off more. In addition to these two builds, Diablo can also take utility talents at any level (except for 13) to improve his survivability when playing with and against certain team compositions.

At level one, he has Devil’s Due (which massively increases the effects of healing globes and healing fountains) and Life Leech (which causes his auto-attacks to deal an additional 1% of the target hero’s health and heal Diablo for 1% of his health). Devil’s Due is usually the better talent, as having every health globe heal you for 50% of your maximum health is very good in nearly every circumstance. Against a team with multiple high-health tanks (such as Stitches, Cho’Gall or another Diablo), however, Life Leech can give the Lord of Terror just enough sustained healing to stay alive.

At level seven, Diablo has Soul Shield (which grants the Lord of Terror a massive amount of Spell Armor depending on how many souls he’s collected) and Diabolical Momentum (which decreases the cooldown of Shadow Charge and Overpower every time he auto-attacks). Diabolical Momentum is generally the better choice, as it massively increases the hero’s disruption ability, but against teams with one or two mage-type heroes (such as Kael’thas, Jaina, Li-Ming or Chromie) Soul Shield can be amazingly strong, as at 100 souls, it basically nullifies nearly all of their damage.

At level 10, Diablo has to choose between Apocalypse and Lightning Breath. Both ultimates are strong, but in very different situations. Apocalypse is best used on tight maps with lots of narrow passages (very similar to maps that you’d want to use the Shadow Charge/Overpower build on) while Lightning Breath is more based on the enemy team composition, as it can be used to dissuade dive heroes or get out of imminent stuns.

At level 13, all the talent options are build-based, but at level 16, Diablo has the option to leave the traditional talent build and take Fearful Presence. This talent passively reduces the auto-attack speed of heroes attacking Diablo by 20% and gives Diablo an active ability that reduces the damage of all nearby heroes by 30%. This talent is somewhat situational, but if the other team is running several auto-attack assassins (such as Raynor, the Butcher and Valla), it can be a great choice.

At level 20, Diablo has four very viable talents to choose from: Dying Breath (which reduces Apocalypse’s cooldown by 20 seconds and casts it for free when Diablo dies), Hellstorm (which increases the duration and area of Lightning Breath by 50%), Lord of Terror (an active ability that steals 10% of the maximum health of all nearby enemy heroes and transfers it to Diablo) and Hellgate (which teleports Diablo a short distance and places a demonic rune at the target location, which functions similarly to the runes from Apocalypse).

Dying Breath is a very good talent if Diablo is dying a lot—however, if Diablo is staying alive (or if he took Lightning Breath) then the talent is virtually useless.

Hellstorm increases the power of Lightning Breath, so it’s very good if Diablo is in a situation where he’s getting a lot of usage out of the ultimate. If Diablo is never able to fully cast the ability, however (or if he took Apocalypse), then another talent will probably be better.

Lord of Terror is a very strong talent for team fights, as long as the other team has at least two warriors or high-health heroes. If Diablo’s enemies are only running one or no tanks, however, then Lord of Terror will often struggle to get any value.

Finally, Diablo has Hellgate, which is almost always a good choice, because it gives the hero even more crowd-control tied to a powerful movement ability. When used in combination with Shadow Charge or Overpower, Hellgate can often secure kills that the other team could never have expected. In addition, the talent gives Diablo a great escape ability, which is something he doesn’t normally have.

Diablo is very strong against melee assassins such as Illidan or Greymane, as he can stun them long enough for his team to pick them off. He’s also very good at dealing with mage heroes like Kael’thas, as they don’t have a good way to escape once Diablo pulls them out of position, and he can virtually nullify their damage with Soul Shield. Finally, Diablo is surprisingly good against other tanks, thanks to the percentage-based damage he can get off of Life Leech and Devastating Charge.

On the other hand, Diablo struggles against auto-attack focused heroes such as Raynor and Valla, as he doesn’t have any form of basic-attack mitigation until level 16. In addition, because of how high Diablo’s health pool is, he is very weak against any heroes who deal percentage-based damage, such as Malthael or Leoric. Finally, Diablo is somewhat weak against teams with a lot of stuns and crowd control, as he doesn’t have any real way to deal with these aside from Lightning Breath.

Diablo performs the best with heroes who possess forms of crowd control, such as Tyrande, Arthas or Kael’thas, as they can set up his combos. In addition, powerful burst damage assassins like Chromie or Jaina do very well with Diablo, as they can capitalize on the opportunities he creates. As for healers, he prefers ones that put out large amounts of burst healing (like Auriel) or large heals-over-time (like Malfurion).

Overall, Diablo is a very powerful warrior, and is very good at shutting down all the dive compositions that are so common in the meta right now. He’s also a lot of fun to play, so if you’re looking for a new tank to run, he might be just what you need!

Hope you enjoyed the article, and I’ll see you in the Nexus!